The post Syscoin Masternode Hot Wallet to Syscoin-Qt appeared first on Justin Silver.
]]>Oh no! If you set up your Syscoin masternode with a hot wallet (by importing a private key for your collateral transaction) then you have put your syscoins at great risk! A flaw in an of the software running on your server could allow a hacker to break in to your system and transfer out the funds associated with your collateral transactions. What to do?
You can correct this problem in a few steps. Make sure to create backups of any wallet.dat files (especially the one on the server).
# if you installed with the automated script
syscoin-cli dumpprivkey YOUR_COLLATERAL_ADDRESS
# if you did NOT install with the automated script
~/syscoin/src/syscoin-cli dumpprivkey YOUR_COLLATERAL_ADDRESS
Now in Syscoin-Qt open the console and enter importprivkey YOUR_COLLATERAL_PRIVATE_KEY. If you haven’t already done so go to Settings/Preferences and enable Masternodes on the Wallet tab. You will need to restart Qt. Now select Tools > Masternode configuration (you may need to navigate to this file manually on a Mac at ~/Library/Application Support/SyscoinCore/masternode.conf. This should look exactly like the masternode.conf file on your server – either copy the contents from there or recreate if you backup copy (you should!).
Next go back to your server and and run the automated install bash script – Masternode Configuration for more info – or run it directly with bash <(curl -sL doublesharp.com/sysmasternode). Follow the prompts to setup up your node under a different user.
# stop syscoind
syscoin-cli stop && killall syscoind
# remove cron jobs
crontab -r
# run automated install
bash <(curl -sL doublesharp.com/sysmasternode)
Once you have run this install wait approximately 30 minutes to make sure your node remains active. If everything worked you will now want to remove the .syscoincore folder for your user to make sure you private keys aren't easily accessible. After you have verified that the node is active (and you have backups!) delete the folder by entering rm -rf ~/.syscoincore
All done!
The post Syscoin Masternode Hot Wallet to Syscoin-Qt appeared first on Justin Silver.
]]>The post Syscoin 3.0 Masternode Configuration appeared first on Justin Silver.
]]>This is a setup guide for creating a Syscoin 3.0 Masternode. You will need a Virtual Private Server (VPS) from hosting providers such as Amazon EC2, DigitalOcean Droplets, Google Compute Engine, Microsoft Azure, Choopa, OVH, or Vultr that meets the following specifications:
- Ubuntu 16.04 LTS x64
- 1+ CPU
- 2GB+ memory
- 40GB+ SSD hard drive
- Static IP Address – Elastic IP, etc
Guide: Masternode VPS Setup
If you need help setting up your VPS see this guide by Syscoin community member JohnP, but be sure to return here before running any commands on your server!
Before You Start
It’s a good idea to read through any script you find on the Internet before running it on a server with root privileges, including this one. Note that to make it easier for beginners this script automatically installs additional firewall and DDOS protection that may interfere with other services if this is not a “fresh” Ubuntu 16.04 LTS VPS.
SCRIPT: https://gist.github.com/doublesharp/bacf7f9ac1ff15dccc1acffe49f989e9#file-masternode-sh
All steps in Syscoin Core Qt should be performed on your local computer, only the automated script should be run on your server. Do not transfer funds to the wallet on your masternode.
Network Configuration
You will need to allocate a static IP to your Syscoin masternode. If your hosting provider implements a firewall (such as Security Groups for Amazon EC2) you will need to allow access to your masternode on TCP port 8369 from everywhere (inbound 0.0.0.0/0). Since we will be using SSH (Putty) to access to server you will need to allow TCP port 22 from everywhere as well.
Upgrading from 2.x to 3.x?
If you are upgrading your wallet from Syscoin 2.x to Syscoin 3.x you MUST run dumpwallet "/full/path/to/dump.txt" and then importwallet "/full/path/to/dump.txt". You will likely want to delete “/full/path/to/dump.txt” after this process as it contains unprotected private keys.
If you are unable to open your wallet.dat with Syscoin-Qt 3.x with an error that your wallet is corrupted you will need to open the wallet using Syscoin-Qt 2.1.6 and call dumpwallet then open Syscoin-Qt 3.x to run importwallet.
WARNING: Your wallet dump file contains unprotected private keys. Please delete it after completing this step!
Windows users will need to take an additional step to open Syscoin-Qt 2.x correctly. Locate the shortcut for Syscoin-Qt 2.x and right click it to select “Properties”, then in the “Target” field add a space and then -datadir=%HOMEPATH%\AppData\Roaming\Syscoin to the end of the value and click “Ok”. This will tell it to open using the legacy “Syscoin” directory instead of the new “SyscoinCore” directory.
PRO TIP: Backing up and encrypting your wallet is out of scope for this guide but if they are new concepts to you please look into how to do them!
Prepare & Send 100k SYS Collateral
To stake your masternode you will need to provide exactly 100,000SYS in your masternode address. Use Syscoin Core Qt for your system to process this transaction.
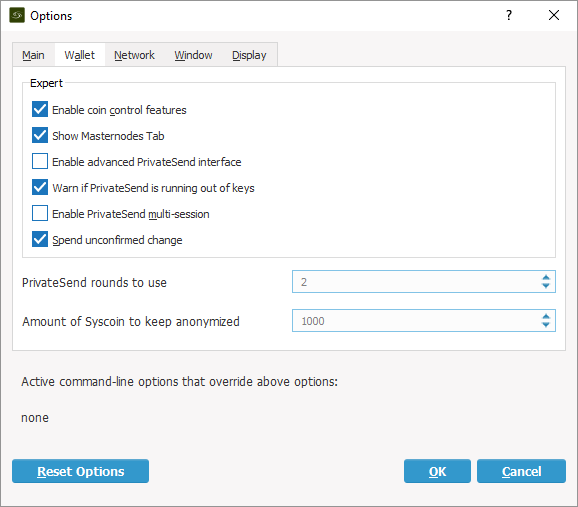
To get started open Syscoin Core Qt on your computer and from the menu select “Settings > Options” on Windows or “Syscoin Core > Preferences..” on a Mac. Select the “Wallet” tab and click the checkbox to “Enable coin control features” and “Show Masternodes Tab”. Click the “Ok” button to save your settings, close Syscoin Core Qt then re-open it to view the new options, then wait for the blockchain to fully sync with the network.
Masternode Private Key & Address
Once your local Syscoin Core Qt has fully synced select “Tools > Debug” and enter masternode genkey to generate your masternode private key. Copy this value as you will need it later, it will look similar to the following:
7ra1rhngvNkhkiFE8STrmvH3LvYTCzLyRFHFsZvrJUBV6ZmWnc
Next type getnewaddress to generate an address to use for collateral. Copy down this address as well as you will need to send your collateral to it in the next step. Note that using an alias is out of scope here, but if you create an alias you may use its address as well.
Multiple Masternodes?
If you are configuring multiple masternodes you will need to create a unique masternode private key and unique collateral address for each masternode using the steps above. Once the address is created for each masternode send a collateral transaction of exactly 100,000SYS to the address for each masternode using the next steps.
WARNING: If you use the same address for multiple masternodes your reward payouts cannot be completed.
Send Collateral to Address
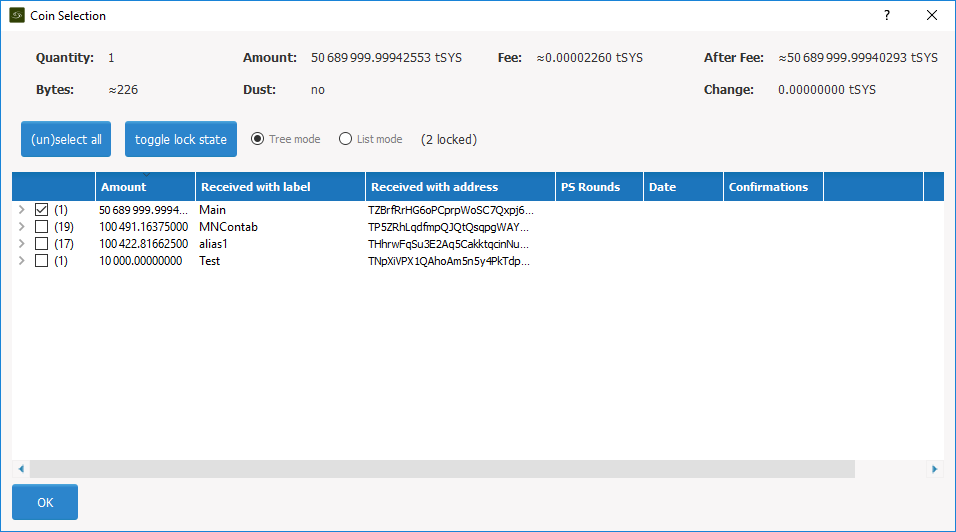
Use Coin Control to ensure that you send your collateral from the correct address. Go to “Send” and then “Inputs” to select the input that you would like to send from. In the example below using tSYS, the “Main” input will be selected. Click “Ok” to return to the “Send” screen.
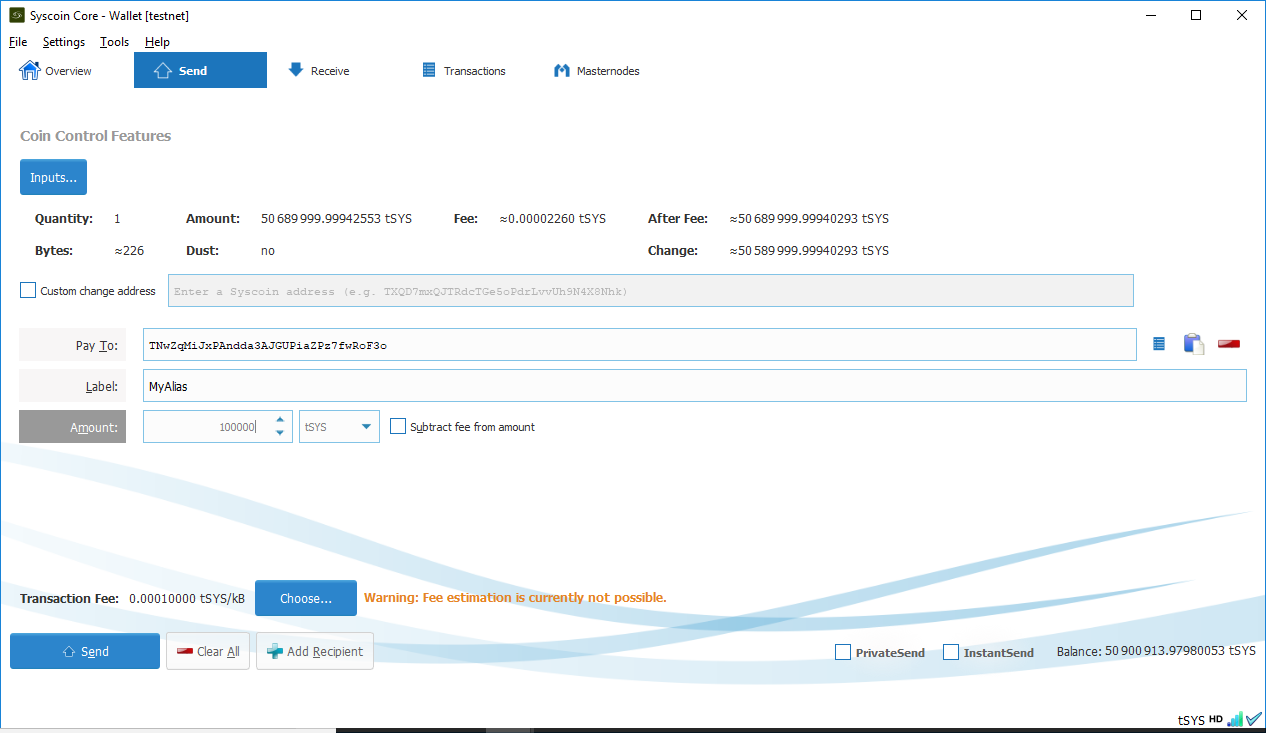
Next enter your masternode collateral address from the previous step into the “Pay To” field. Enter “100,000” exactly into the “Amount” field and do NOT subtract fees from the amount as it will reduce your collateral total.
Press “Send” to send your Syscoin to your masternode collateral address. You will need to wait 1 block – approximately 1 minute – for the transaction to confirm.
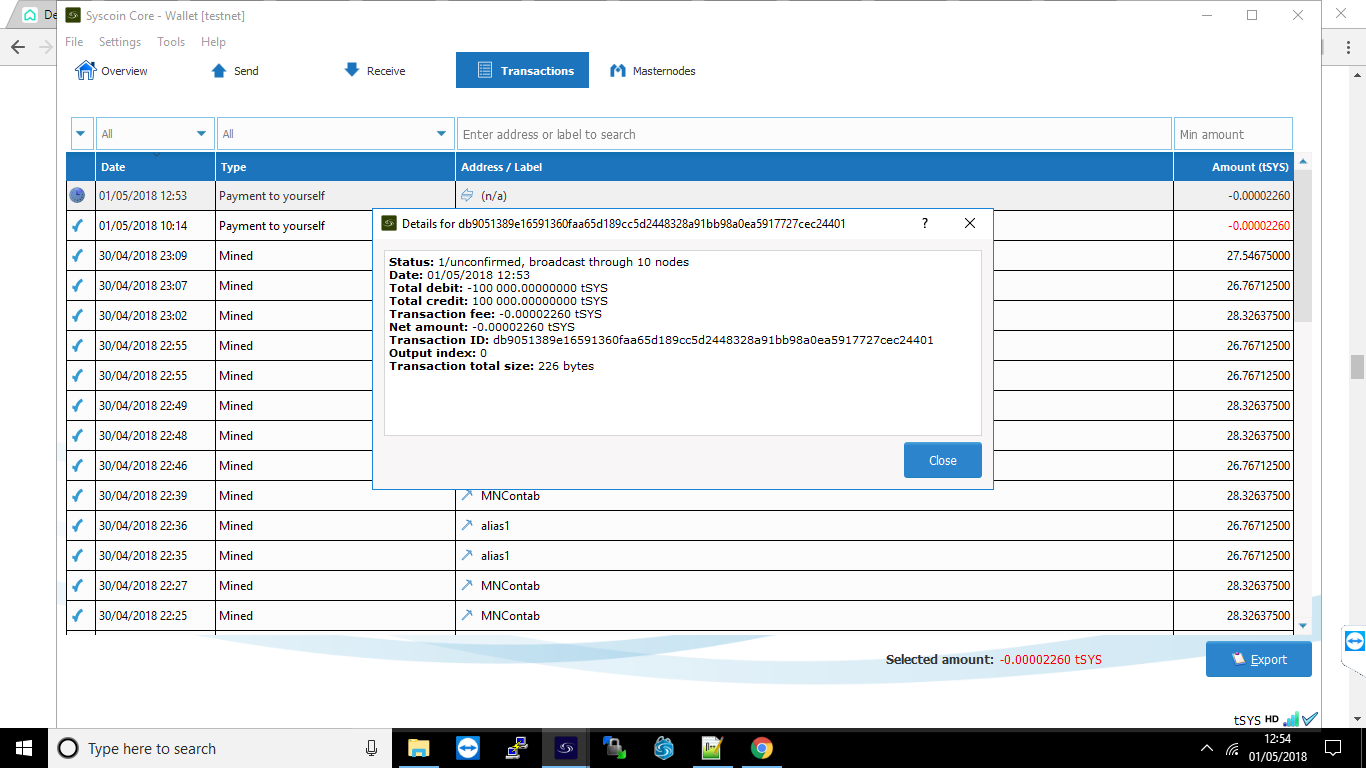
Next you will need to get the transaction id for the collateral by selecting the “Transactions” tab to see the 100,000SYS sent to yourself. Right click this transaction to view the id, and copy it down as well for later use.
Get Masternode Outputs
In Syscoin Core Qt again open the “Tools > Debug” menu and enter masternode outputs. You will get a long string that is a hash of the transaction id from the previous step followed by a “0” or “1” to indicate the output index. The result should resemble the following:
{
“06e38868bb8f9958e34d5155437d009b72dff33fc87fd42e51c0f74fdb” : “0”,
}
Configure Masternode via Syscoin Core Qt
From the Syscoin-Qt menu select “Tools > Open Masternode Configuration File”. You will need to enter your masternode information using a text editor in the following format and use the public IP address of your server not your local computer. Make sure that the line does not start with a # as this will comment out the line! If you don’t see your masternode listed in the “Masternode” tab please double check this configuration.
# Masternode config file
# Format: alias IP:port masternodeprivkey collateral_output_txid collateral_output_index
mn1 123.123.123.123:8369 7ra1rhngvNkhkiFE8STrmvH3LvYTCzLyRFHFsZvrJUBV6ZmWnc 06e38868bb8f9958e34d5155437d009b72dff33fc87fd42e51c0f74fdb 0
Save this file and close Syscoin-Qt.
Configure Masternode
Finally we are ready to work on your server. Connect to your VPS via SSH (Putty) and enter the following command to start the automated install:
bash <(curl -sL doublesharp.com/sysmasternode)
Default values are found in brackets and pressing enter will selected the [default] value. For entries with a [Y/n] the capital letter is the default. Enter [Y] to choose “yes” or [N] to choose “no”. Likely the only value you will need to enter is your masternode private key.
Syscoin Core Github Branch [master]:
Masternode Private Key []: 7ra1rhngvNkhkiFE8STrmvH3LvYTCzLyRFHFsZvrJUBV6ZmWnc
External IP Address [123.123.123.123]:
Masternode Port [8369]:

Press any key to continue or Ctrl+C to exit...
Once the build process and configuration have completed type source ~/.bashrc to access the syscoind and syscoin-cli executables via the new syscoin user.
Enable Masternode
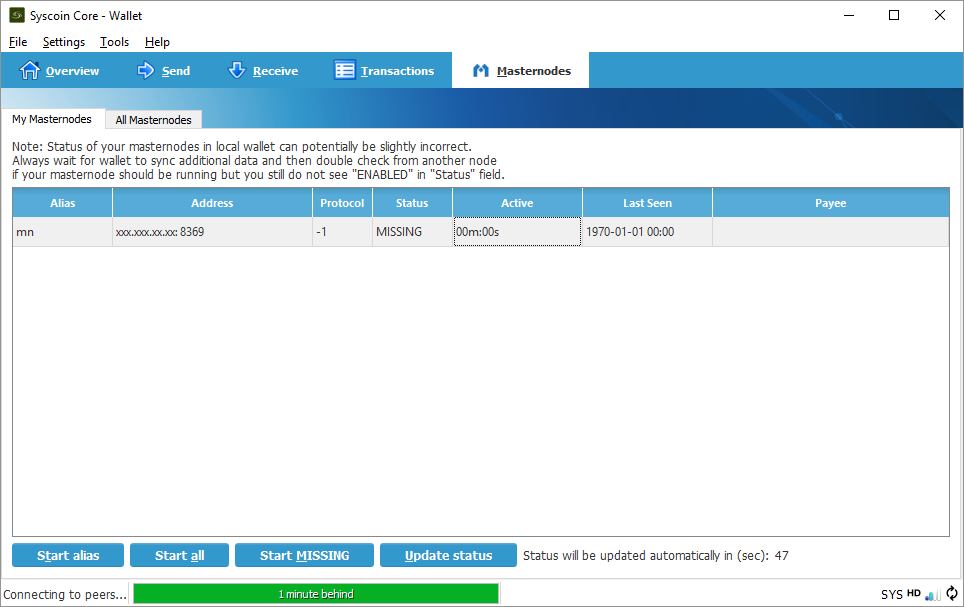
Back on your local computer restart Syscoin Core Qt and wait for it to sync up to the network. Choose the “Masternodes” tab, select your masternode, then click “Initialize alias”. Only click this button once and if your “Status” ever changes it’s recommended to confer with the #masternodes Slack channel before restarting your node – if you restart you will need to re-qualify for rewards and won’t receive any rewards during this time. Read on for more information.
Eligibility for Rewards
Keep in mind that your masternode will not immediately be eligible for rewards. The eligibility period is determined by the formula [number of masternodes] * 2.6 * 60 seconds.
Note, if you restart your masternode by pressing “Initialize” in Qt this counter will reset and you will not receive rewards until your masternode is eligible again.
Masternode Server Commands
Now that syscoind is running under the syscoin user you will need to access it differently. The cron job for sentinel ping is also installed under this user. The following commands may be useful to run on your server.
# view your syscoin.conf
sudo cat /home/syscoin/.syscoincore/syscoin.conf

# view your sentinel.conf
sudo cat /home/syscoin/sentinel/sentinel.conf

# view the syscoin user crontab which should contain:
# */10 * * * * /usr/local/bin/sentinel-ping
sudo crontab -u syscoin -l

# run a sentinel ping to speed up Qt syncing? why not!
sudo su -c "sentinel-ping" syscoin

# view the sentinel-ping cron log, look for errors
sudo less /home/syscoin/sentinel/sentinel-cron.log

# view the syscoind debug log, look for errors
sudo less /home/syscoin/.syscoincore/debug.log

# start and stop the syscoind systemd service
sudo service syscoind stop
sudo service syscoind start
sudo service syscoind restart

# check that the syscoind process is running at the proper user
ps aux | grep [s]yscoind

# log out and back in or run the following to alias syscoind and syscoin-cli
source ~/.bashrc

# now the commands run as the syscoin user
syscoin-cli getinfo
syscoin-cli mnsync status
syscoin-cli masternode status

# it is aliased to this shorter function
syscli getinfo
syscli mnsync status
syscli masternode status

# if you really want to log in as the syscoin user
sudo su - syscoin
Summary
This script installs the necessary dependencies to build the Syscoin Core from source. It creates a user named “syscoin” and uses a systemd service to start the syscoind process as the “syscoin” user, and it set to start on boot after the necessary networking services have started.
Updates and reconfigurations can be performed by entering the command sysmasternode or the initial auto install command bash <(curl -sL doublesharp.com/sysmasternode).
Tips!
This automated install script was written by demesm and doublesharp. If it saved you time setting you your masternode please consider sending a tip. Thanks!
doublesharp @ alias doublesharp / address SjaXL2hXfpiuoPZrRFEPawUSHVjwkdu5az”
demesm @ address SkSsc5DDejrXq2HfRf9B9QDqHrNiuUvA9Y
The post Syscoin 3.0 Masternode Configuration appeared first on Justin Silver.
]]>